
Imagine pulling into your driveway and seeing a garage door that not only operates flawlessly but also enhances your home’s overall charm and value. A well-framed garage door can make this vision a reality. Framing a garage door is more than just a construction task; it’s a crucial step that enhances your home’s structural integrity, boosts its aesthetic appeal, and can even increase its property value.
Understanding Garage Door Framing Basics
What is Garage Door Framing?
Garage door framing is the structural framework that supports your garage door. It’s the backbone that ensures your door operates smoothly and safely. Without a solid frame, your garage door could sag, misalign, or even fail during extreme weather.
Key Components of Garage Door Framing
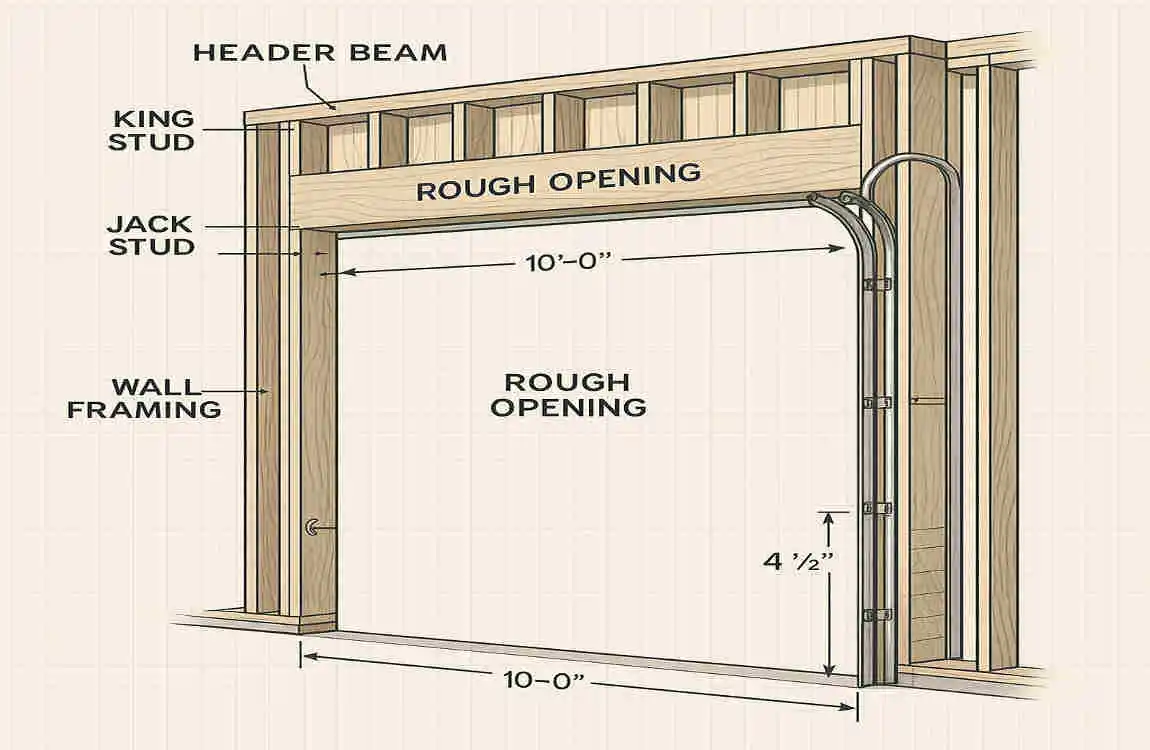
When you decide to frame a garage door, you’ll encounter several key components:
- Header: The horizontal beam that spans the top of the garage door opening, supporting the weight above.
- King Studs: The vertical studs that run from the bottom plate to the top plate, providing the main support for the header.
- Trimmer Studs: Also known as jack studs, these are positioned next to the king studs and help support the header.
- Cripple Studs: Short studs that fill the space between the header and the top plate, as well as between the bottom plate and the bottom of the door opening.
Types of Framing Materials
You have two primary options for framing materials:
- Wood: A traditional choice that’s cost-effective and easy to work with. However, it may require more maintenance over time.
- Steel: More durable and resistant to pests and rot, but it can be more challenging to cut and assemble.
The Importance of Proper Framing
Proper framing is not just about aesthetics; it’s critical for your garage and home’s overall durability and safety. A well-framed garage door can withstand the elements, prevent structural damage, and ensure smooth operation for years to come.
Tools and Materials Needed to Frame a Garage Door
Essential Tools
To tackle the task of how to frame a garage door, you’ll need a set of tools:
- Measuring tape
- Level
- Hammer
- Saw (circular or hand saw)
- Drill
- Nails and screws
- Safety goggles and gloves
Required Materials
Here’s a list of materials you’ll need for framing:
- Lumber (typically 2x4s or 2x6s, depending on your door size)
- Metal connectors (optional but recommended for added strength)
- Insulation (if you’re looking to improve energy efficiency)
Choosing Quality Materials
When selecting your materials, opt for high-quality lumber that’s straight and free of significant defects. If you’re using metal connectors, ensure they’re rated for the load they’ll be supporting.
Step-by-Step Guide on How to Frame a Garage Door
Preparing the Site and Measuring the Opening
Before you start framing, take the time to prepare your site. Clear any debris and ensure the area is level. Then, it’s time to measure your garage door opening. Accuracy is key here, as even minor discrepancies can lead to issues down the line.
- Measure the width and height of the opening.
- Double-check your measurements to ensure they’re correct.
- Consider the size of your garage door and any additional space needed for installation.
Building the Header
The header is a critical component of your garage door frame, as it distributes the weight above the opening. Here’s how to build and Install it:
- Select the right size and material for your header based on your door’s dimensions and the load it will bear.
- Cut your lumber to the appropriate length.
- Assemble the header by nailing or screwing the pieces together.
- Install the header securely above the opening, ensuring it’s level and adequately supported.
Installing King Studs and Trimmer Studs
The king studs and trimmer studs work together to support the header and maintain the structural integrity of your frame.
- Position the king studs on either side of the opening, running from the bottom plate to the top plate.
- Secure the king studs in place.
- Install the trimmer studs next to the king studs, ensuring they’re properly aligned and fastened.
Adding Cripple Studs Above and Below the Opening
Cripple studs help to fill in the gaps above and below the garage door opening, providing additional support and stability.
- Measure and cut the cripple studs to the appropriate length.
- Install the cripple studs above the header, evenly spaced.
- If needed, add cripple studs below the opening to fill any gaps.
Securing the Frame and Checking for Level
With your frame in place, it’s crucial to ensure it’s square, level, and plumb. Here’s how:
- Use a level to check the vertical studs and header.
- Adjust the frame as needed to ensure it’s perfectly aligned.
- Secure the frame in place and make any necessary corrections.
Reinforcing the Frame with Metal Connectors (Optional)
For added strength and durability, consider reinforcing your frame with metal connectors. These can distribute the load more evenly and prevent potential issues down the line.
- Select the appropriate type and size of metal connectors for your frame.
- Install the connectors according to the manufacturer’s instructions, ensuring they’re securely fastened.
Final Inspection and Preparation for Garage Door Installation
Before installing your garage door, take the time to perform a final inspection of your frame.
- Check that all components are securely fastened and properly aligned.
- Look for any signs of damage or weakness in the frame.
- Make any necessary adjustments or repairs before proceeding.
Expert Tips and Best Practices to Enhance Your Garage Frame
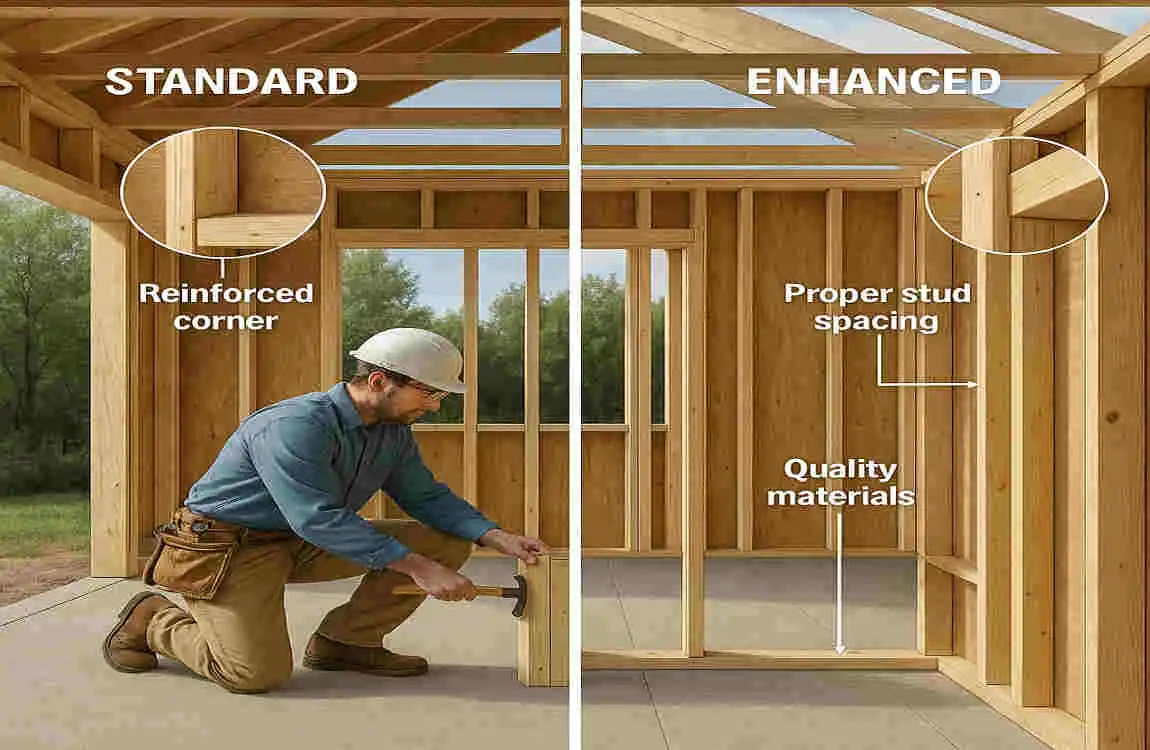
Avoiding Common Framing Mistakes
To ensure your garage door frame is up to par, be mindful of these common mistakes:
- Inaccurate measurements leading to an ill-fitting door
- Insufficient support for the header, causing sagging or failure
- Improper alignment of studs, resulting in an uneven frame
Choosing Materials for Different Climates and Conditions
Consider your local climate and conditions when selecting your framing materials:
- In humid environments, opt for pressure-treated lumber or steel to resist rot and pests.
- In cold climates, ensure your frame is well insulated to prevent heat loss and condensation.
The Importance of Insulation and Weatherproofing
Insulating your garage door frame can improve energy efficiency and help prevent moisture issues. Consider adding weather stripping around the door to enhance the seal.
When to Consult a Professional vs. DIY
While framing a garage door can be a rewarding DIY project, there are times when it’s best to call in a professional:
- If you’re unsure about any aspect of the process or lack the necessary tools and skills
- If your garage door is particularly large or heavy, requiring specialized equipment
- If you live in an area with strict building codes or permit requirements
How Framing Impacts Garage Door Functionality and Longevity
A well-framed garage door can significantly impact its overall performance and lifespan:
- Proper framing ensures smooth operation, reducing wear and tear on the door and opener.
- A sturdy frame can help to prevent sagging or misalignment, which can lead to premature failure.
- By evenly distributing the door’s weight, a solid frame can extend the life of your garage door and its components.
Design Considerations to Boost Your Home’s Style
How a Well-Framed Garage Door Improves Curb Appeal
A well-framed garage door can be a standout feature of your home’s exterior, adding to its overall curb appeal. By choosing the right materials, colors, and styles, you can create a cohesive look that enhances your home’s aesthetic.
Integrating Architectural Styles via Door Frame Design
Your garage door frame can be an opportunity to showcase your home’s architectural style:
- For a modern look, consider a sleek, minimalist frame with clean lines.
- For a traditional or rustic feel, opt for a frame with decorative trim or exposed beams.
- For a craftsman-style home, choose a frame with detailed molding and a warm, natural wood finish.
Tips for Coordinating Framing with Garage Door Materials and Colors
When selecting your frame, keep your garage door’s materials and colors in mind:
- If you have a steel door, a steel frame can create a cohesive, industrial look.
- For a wooden door, a matching wood frame can enhance the natural beauty of the materials.
- Consider painting your frame to complement or contrast with your door’s color, creating a striking visual effect.
Incorporating Smart Garage Door Technology and Framing Adjustments
If you’re planning to Install a brilliant garage door opener, consider how your framing might need to be adjusted:
- Some smart openers require additional space above the door for the motor and sensors.
- You may need to reinforce the frame to support the added weight of the opener and its components.
- Consider running power and data cables through the frame for a clean, professional installation.
Maintenance and Upkeep for a Strong Garage Door Frame
Routine Inspections for Damage or Wear
To keep your garage door frame in top condition, perform regular inspections:
- Look for signs of rot, warping, or cracking in the wood.
- Check for rust or corrosion on metal components.
- Ensure all fasteners are secure and the frame remains level and plumb.
Repairing Minor Cracks or Warping in the Frame
If you notice minor issues with your frame, address them promptly:
- For small cracks in wood, use wood filler and sand smooth.
- For warping, consider using a heat gun to soften the wood, then clamp it back into shape.
- If metal components show signs of rust, sand them down and apply a rust-inhibiting primer and paint.
Seasonal Maintenance Tips to Prolong Frame Life
To extend the life of your garage door frame, follow these seasonal maintenance tips:
- In the spring, clean the frame and apply a fresh coat of paint or sealant.
- In the summer, check for signs of sun damage and consider adding UV protection to your finish.
- In the fall, inspect the frame for any damage from summer storms and make necessary repairs.
- In the winter, ensure the frame is properly sealed against moisture and consider adding additional insulation if needed.
Signs Your Frame Needs Professional Repair or Replacement
While many issues can be addressed with DIY repairs, there are times when professional intervention is necessary:
- If you notice significant structural damage or weakening of the frame.
- If the frame is no longer level or plumb and cannot be easily adjusted.
- If you’re unsure about the extent of the damage or the best course of action for repairs.